Checksum-Aide Tutorial
Red Regent Software
Version 1.1.1.0
Copyright © 2020 – All rights reserved

Introduction:
Checksum-Aide is a utility used to generate checksum codes. The checksum code is sometimes referred to as a hash code or CRC code. Hash codes are used for a variety of reasons, including the detection of data errors and the verification of programs and data files.
You can use a checksum code to make sure that software you downloaded from the internet has not been modified or tampered with in any manner. At other times, while downloading software from the internet, data errors occur in the file transfer process. So, a checksum code can also help to verify the integrity of the downloaded program.
How the checksum process works:
You visit a software supplier’s website and go to their download page where you are presented with a download link. On the same web page where the download link is located, the software provider will often provide a checksum code that you can use to verify the integrity of your software. After downloading the software, you would use a utility (like Checksum-Aide) to generate a checksum/hash code that you compare against the code provided on the website. If the code matches, then you know that the software was downloaded correctly and that it has not been modified.
This code verification process becomes even more useful if you downloaded your software file from another website and wanted to confirm that you’re working with an unmodified original file. After downloading the file, you should then go to the original software author’s website and look for a hash code (many software authors provide this code). After you have found the code, use a program like Checksum-Aide to compare the hash code of the downloaded software to the code available on the vendor’s website.
References to Screen Objects:
This document uses a specific set of conventions for referring to items found on the application screen. Please see below:
- When navigating through levels of menu items, the different levels will be referred to as “Level1/Level2” (surrounded by quotes). An example of this is the “Help/About” menu item.
- The names of tabs on the main screen will be enclosed in double-quotes (e.g., “Text” tab).
- Buttons are enclosed in square brackets (i.e. []). An example of this is the [Help] button.
- Hotkeys are also enclosed in square brackets (e.g., [F1] key).
- Radio buttons and check-boxes will be enclosed in quotes (e.g., “MD5”).
Getting Online Help:
At any time, you can click on the [Help] button, press the [F1] key, or select Help/Contents menu option to get help with this application. The [F1] key will provide you with context-sensitive help while the [Help] button and “Help/Contents” menu will take you to the “Contents” section of the help document.
Let’s Get Started:
When you start the Checksum-Aide application, you are presented with a screen that looks similar to the following:
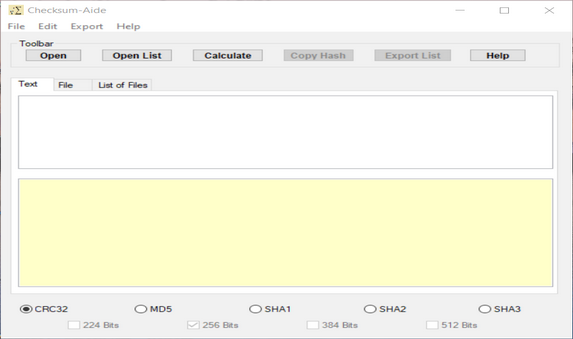
From this screen, you have the option to do any of the following:
- Click on the “Text” tab with your mouse. Then enter or paste text directly into the “Text” tab.
- After entering or pasting the text into the data-entry box of the “Text” tab, you can choose your hash code type and/or bit settings.
- Then, finally, you click on the [Calculate] button to display your hash code.
- Open a single file from the “File” tab by clicking on the [Open] button or selecting “File/Open” from the menu.
- Just like the “Text” tab, you would then select your hash code type and/or bit settings.
- Afterward, you click on the [Calculate] button to display the hash code for your file.
- Choose multiple files from the “List of Files” tab.
- You do this by clicking on the “Open List” button or selecting “File/Open List” from the menu.
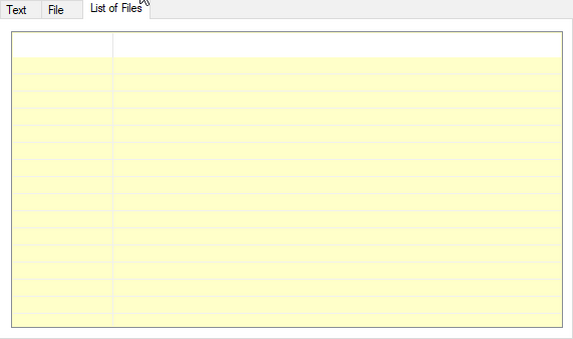
- This option will automatically calculate multiple hash codes for each file you selected and display them in a grid.
- Please keep in mind that if you select 10 or more files at a time, then the calculation process may be time-consuming and could take several minutes or even longer.
See the exercises below for more detailed instructions on working with the three tabs.
Exercise - Entering or Pasting Text (“Text” tab):
To demonstrate the use of the “Text” tab, please follow these steps:
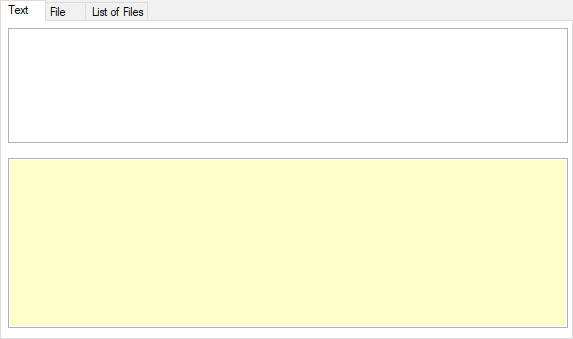
- With the application open, click on the “Text” tab.
- Click on the text box at the top of the tab.
- Enter the words “John Smith” (without the quotes).
- Click on the “CRC32” radio button (please see the “Available Hash Codes” section for more details).
- Click the [Calculate] button.
After following these steps, your hash code will be displayed on the lower section of the tab. You now have the option to copy the hash code to the clipboard by selecting the “Edit/Copy hash to clipboard” menu option. You can also change your hash code/bits settings and perform the calculation again.
You can copy the hash code for use with other applications by copying it to the clipboard. You can do this by selecting the “Edit/Copy hash to clipboard” menu option.
NOTE: For step #1 (above), if you had text in the clipboard, you could have also pasted it using the [Ctrl]+[V] keys instead of manually entering the text.
Exercise - Working with a Single File (“File” tab):
For this exercise, you will choose a file from your Documents folder (you will decide which file):
- Click on the [Open] button or the “File/Open” menu option.
- Go to your Documents folder and choose any file.
- For Windows XP, this will be something like C:\Documents and Settings\YOUR_NAME\My Documents\.
- For Windows 7/8/10, your folder would be similar to C:\Users\YOUR_NAME\Documents\.
- Select a file from your documents folder and then click on the [Open] button of the “Open File” dialog.
- Click on the “SHA3” radio button then click on “512 Bits” (see the “Available Hash Codes” section for more information).
- Click on the [Calculate] button.
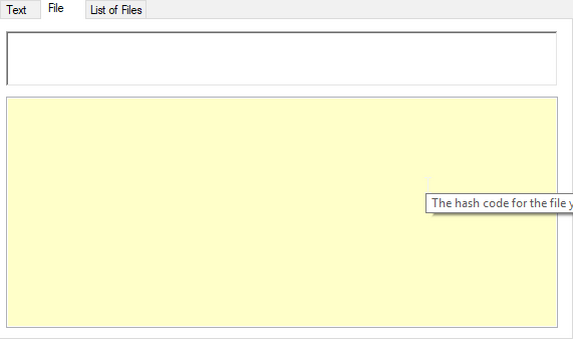
After performing the last step (above), your hash code will be displayed on the lower section of the “File” tab. You can copy the hash code to the clipboard by selecting the “Edit/Copy hash to clipboard” menu option.
Working with Multiple Files:
In this last exercise, you will go to your Documents folder again. However, this time, you will choose three files instead of one. Please follow these steps:
- Click on the “File/Open List” menu option or click on the [Open List] button.
- Go, once again, to your Documents folder (see 2.a or 2.b in the previous section).
- Use the [Shift] or [Ctrl] keys together with your mouse click to choose three files from your Documents folder.
- Click on the [Open] button of the “Open Files(s)” dialog.
- The files will be opened, and hash codes are automatically calculated.
Your hash codes are displayed on a grid. You can right-click on an individual grid row and choose “Copy Codes to Clipboard”. As an alternative, you can also export the entire list by either clicking on the [Export to CSV] button or clicking on the “Export/Export List to CSV” menu option.
Using Drag & Drop:
Overview:
Drag and Drop is an operating system feature that allows you to use the mouse to drag data from one area of your computer screen to another. Checksum-Aide uses this feature as an alternative way of bringing data into the application so that you can calculate hash codes.
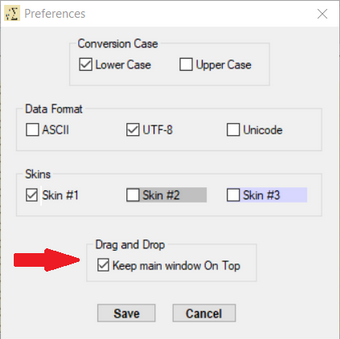
Keeping the Main Window on top during Drag and Drop:
While dragging and dropping data from another application into Checksum-Aide, it is sometimes difficult because the application goes out of focus and you are forced to switch windows to bring it back into focus. By going to the “Preferences” screen and checking “Keep main window On Top”, the Checksum-Aide window will remain modal so that it does not lose focus when you are dragging files or text from another application.
Dragging text from another application:
You can drag text data into Checksum-Aide from other applications such as WordPad and Microsoft Word. In some cases, the text that you drag will be removed from the source application.
For example, if you wanted to drag a block of text from WordPad:
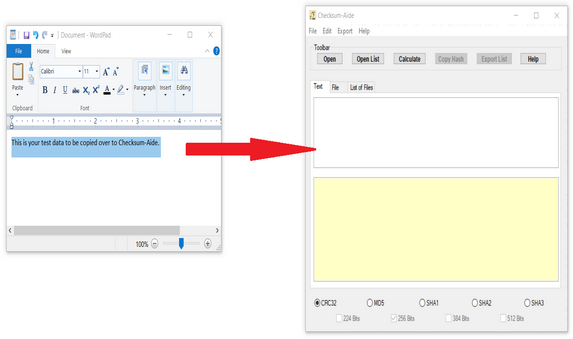
- You would first switch to WordPad and highlight the text that you wish to drag (both WordPad and Checksum-Aide need to be visible on the screen).
- Next, click on the text and hold down the left button while dragging the text over to the Text tab of Checksum-Aide.
- Once over the Text tab, release the left mouse button to drop the Text into Checksum-aide.
Dragging text around within Checksum-Aide:
While in the Text tab, it is possible to drag a previously calculated hash code from the bottom of the screen into the editable text field. Why would you do this? You might perform this task as a crude way of encrypting a previously calculated hash code.
To accomplish this task:
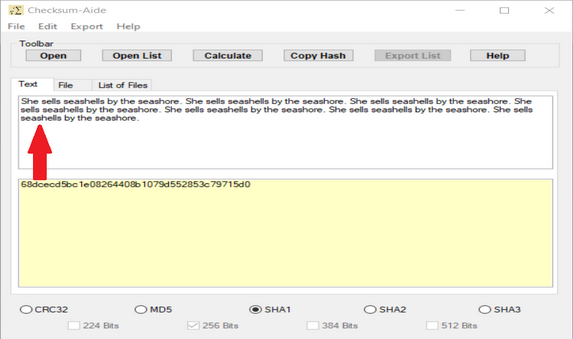
- In the Text tab, calculate the hash code on some text that you have typed, pasted, or dragged into the Text tab.
- Now, highlight the calculated hash code and hold down the left mouse button to drag it back into the editable text field and release the left mouse button.
- If there is already text in this field, you will be prompted to overwrite it.
- If prompted to overwrite data in the editable text field, confirm with “Yes” to overwrite the text.
Dragging text out of Checksum-Aide:
The process of dragging and dropping text is bi-directional. As a result, this means you will also be able to drag data from the Text tab into another application. For example, let’s drag some data from the Text tab to WordPad.
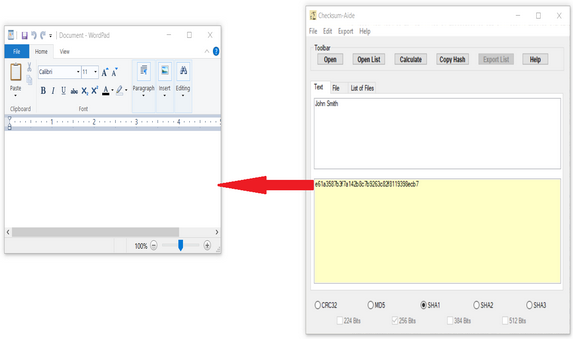
- Make sure that both Checksum-Aide and WordPad are visible on the screen.
- Calculate a hash code on data in the Text tab.
- Highlight the calculated hash code and hold down the left mouse button while dragging the data over to WordPad.
- While over WordPad, release the left mouse button.
Dragging files into the Text tab:
The Text tab also supports dragging and dropping of file data. For example, you can drag a text file into the Text tab. Checksum-Aide will then read the data in the file and drop it into the Text tab.
Here is an example to demonstrate this:
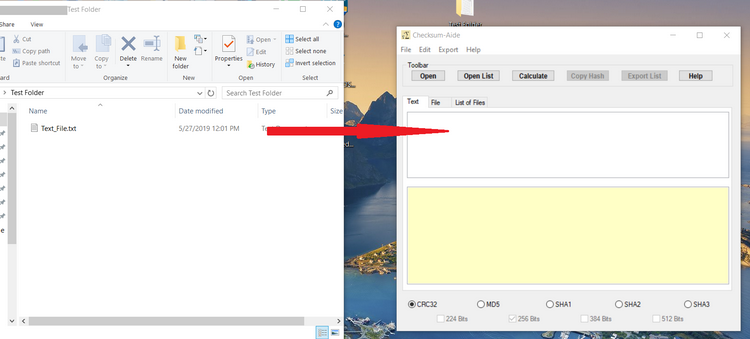
- Open an Explorer window and locate a text file that you wish to drag into Checksum-Aide.
- Make sure that both Explorer and Checksum-Aide are visible.
- Click on the text file with the left mouse button and hold it down.
- Drag the text file (with the left mouse button held down) to the Text tab of Checksum-Aide.
Dragging a file into the File tab:
In order to drag a file from Explorer into the “File” tab, this tab must first be in focus. Here is an example of how we would drag and drop a file into the File tab:
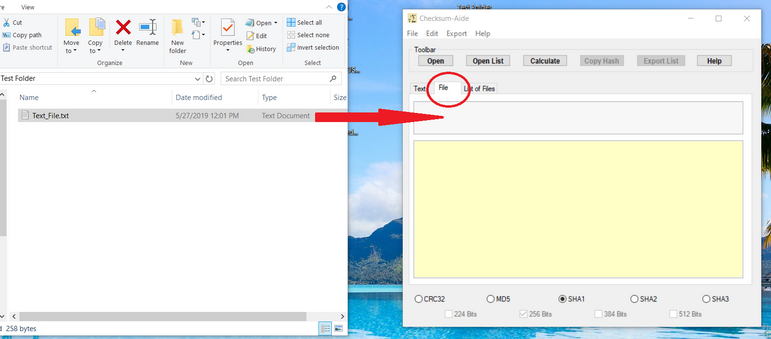
- Make sure that both Explorer and Checksum-Aide are visible.
- Click on the “File” tab to bring it into focus.
- Click on the text file with the left mouse button and hold the button down while dragging the file to Checksum-Aide.
- When the mouse is over the “File” tab, release the mouse button.
Dragging a single file into the List of Files tab:
When dragging a single file into the “List of Files” tab, this tab must already be in focus. Here is an example of dragging a single file to the “List of Files” tab:
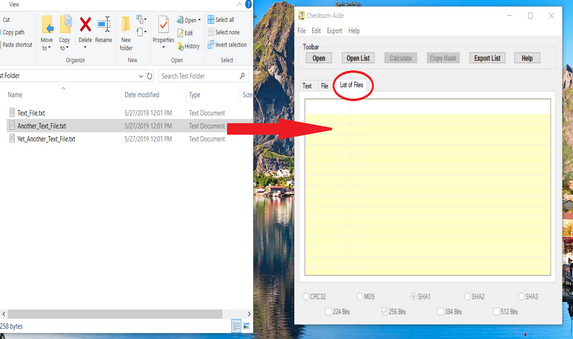
- Make sure that Explorer and Checksum-Aide are both visible.
- Click on the “List of Files” tab to bring it into focus.
- Use the left mouse button to click on the text file you wish to drag and hold down the left button while dragging the file to Checksum-Aide.
- When the mouse is over the “List of Files” tab, release the mouse button.
Dragging multiple files into the List of Files tab:
When you select multiple files at a time for dragging into the “List of Files” tab, this tab does not have to be in focus.
Here is how you would drag multiple files into the “List of Files” tab:
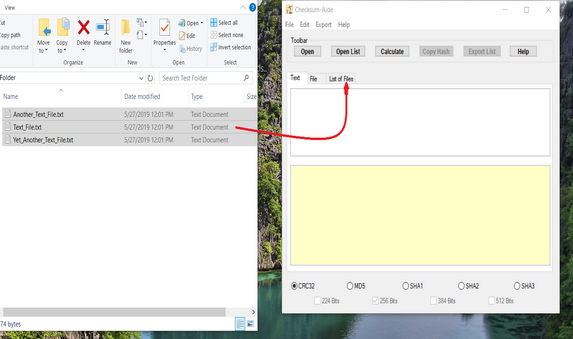
- Make sure that both Explorer and Checksum-Aide are visible.
- In Explorer, select all the files that you wish to drag.
- With the left mouse button held down, drag the files and hover over the “List of Files” tab.
- Release the mouse button over the “List of Files” tab.
Available Hash Codes:

Checksum-Aide provides you with the ability to calculate up to eleven different hash codes. The available hash codes are:
- CRC32 (which is actually CRC-32B in this application)
- MD5
- SHA-1
- SHA-224 (SHA2 plus 224 bits)
- SHA-256 (SHA2 plus 256 bits)
- SHA-384 (SHA2 plus 384 bits)
- SHA-512 (SHA2 plus 512 bits)
- SHA-3-224 (SHA3 plus 224 bits)
- SHA-3-256 (SHA3 plus 256 bits)
- SHA-3-384 (SHA3 plus 384 bits)
- SHA-3-512 (SHA3 plus 512 bits)
For additional information, please see the online help document.